Change Proximus Internet password
In some cases you'll handle the PPPoE connection in your router.
The main reason is to connect to the Proximus network from your router and let your personal hardware manage the DHCP.
If you know your login and password, it's really easy. But if like me, you lost your original password / don't remember it / never saved it in your favorite password tool / ... you're doomed. Or not.
Proximus made it simple, you can login on their website and in the MyProducts section you need to select your "Internet" product.
From there you'll be able to define a new password without the need to enter your old password.
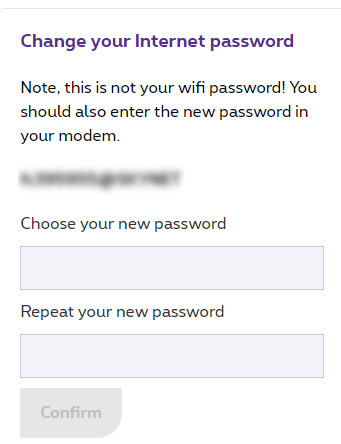
When the password is changed, it will take effect within two hours.
My first error was to change it too in my modem -> No more Internet at home.
In fact you can use the old password as long as Proximus didn't validate your new password.
Two hours later... No Internet!
The WAF was aligned with the two hours but not with more.
I had two solutions:
- Try a new password on Proximus website (and wait two more hours)
- Contact the Support
I don't remember my web search but I found a ticket about the PPPoE connection with the Proximus modem and the new password rule.
In fact, the new password must be eight characters long and it must only contain alphanumeric characters.
The thing I didn't say is that I used a password generator to have something complex on my first try.
So before to call the Support, I changed my password to match the rule (on Proximus website and in my router) and it worked right away.
Change the status bar color in your Xamarin.Forms app
It's the second time I need to change the status bar color in a Xamarin.Forms (Android) and I didn't remember how to do it.
As I don't want to search it again, I decided to add the information here.
The status bar is the top part of the application where you can find the battery level, the network status,...

In your Android project, just add the following line in the styles.xml file and use the color you like:
<item name="android:statusBarColor">#3F4550</item>
Frame HeightRequest not applied
For each of my items in the ListView, I wanted to display the title of the show and the remaining episodes.
But it can be really difficult to see the label on an image.
A solution I used in my previous Windows Phone app was to add a border with a background color. So I decided to use the same tip with the Frame control.
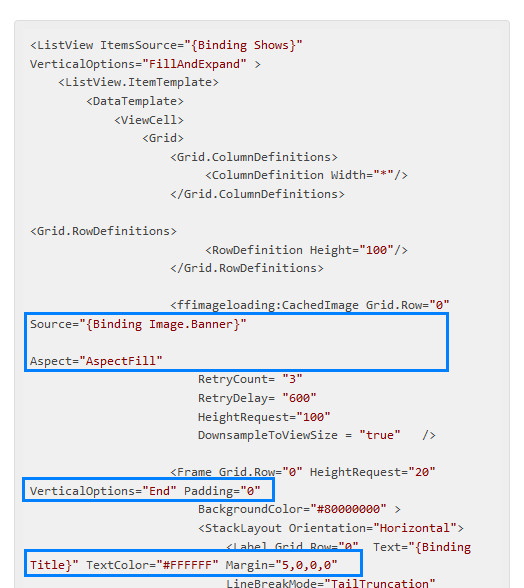
<Frame Grid.Row="0" HeightRequest="22" VerticalOptions="End"  BackgroundColor="#80000000" >
    <StackLayout Orientation="Horizontal">
        <Label Grid.Row="0"  Text="{Binding Title}" TextColor="#FFFFFF" Margin="5,0,0,0" LineBreakMode="TailTruncation"
                    HorizontalOptions="StartAndExpand" FontAttributes="Bold" FontSize="Subtitle"/>
        <Label Grid.Row="0"  Text="{Binding User.Remaining}" TextColor="#FFFFFF" Margin="0,0,5,0" HorizontalOptions="End"
                    FontAttributes="Bold" FontSize="Subtitle" />
    </StackLayout>
</Frame>
To have the expected result, you just need to set the Frame's Padding to 0.
<Frame Grid.Row="0" HeightRequest="22" VerticalOptions="End"  BackgroundColor="#80000000" Padding="0">
    <StackLayout Orientation="Horizontal">
        <Label Grid.Row="0"  Text="{Binding Title}" TextColor="#FFFFFF" Margin="5,0,0,0" LineBreakMode="TailTruncation"
                    HorizontalOptions="StartAndExpand" FontAttributes="Bold" FontSize="Subtitle"/>
        <Label Grid.Row="0"  Text="{Binding User.Remaining}" TextColor="#FFFFFF" Margin="0,0,5,0" HorizontalOptions="End"
                    FontAttributes="Bold" FontSize="Subtitle" />
    </StackLayout>
</Frame>
And now the HeightRequest defined is applied.
Syntax Highlighting In Wyam
In my previous blog post I saw that the syntax highlighting was weird on a phone.
A carriage return was added automatically instead of taking advantage of the power of a scrollbar.
pre code {
        white-space: pre;
        word-wrap: normal;
}
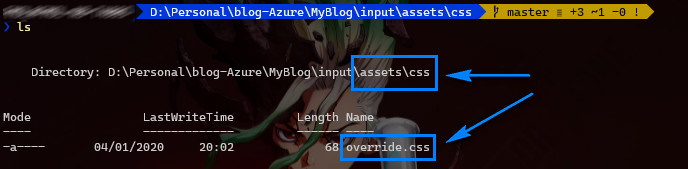
Just create the following folder structure in your input directory, create a file named override.css and add the pre code style in it.
Row height in ListView ItemTemplate
In my App I wanted to have a view for my TV shows.
As I have a WPF and Windows Phone background, I tried to set the row height on the Grid RowDefinition.
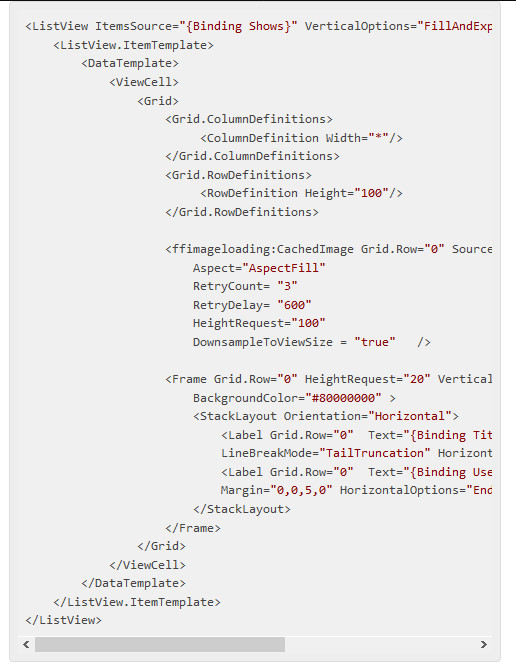
<ListView ItemsSource="{Binding Shows}" VerticalOptions="FillAndExpand" >
    <ListView.ItemTemplate>
        <DataTemplate>
            <ViewCell>
                <Grid>
                    <Grid.ColumnDefinitions>
                         <ColumnDefinition Width="*"/>
                    </Grid.ColumnDefinitions>
                    <Grid.RowDefinitions>
                         <RowDefinition Height="100"/>
                    </Grid.RowDefinitions>

                    <ffimageloading:CachedImage Grid.Row="0" Source="{Binding Image.Banner}"
                        Aspect="AspectFill"
                        RetryCount= "3"
                        RetryDelay= "600"
                        HeightRequest="100"
                        DownsampleToViewSize = "true"	/>

                    <Frame Grid.Row="0" HeightRequest="20" VerticalOptions="End" Padding="0"
                        BackgroundColor="#80000000" >
                        <StackLayout Orientation="Horizontal">
                            <Label Grid.Row="0"  Text="{Binding Title}" TextColor="#FFFFFF" Margin="5,0,0,0"
                            LineBreakMode="TailTruncation" HorizontalOptions="StartAndExpand"/>
                            <Label Grid.Row="0"  Text="{Binding User.Remaining}" TextColor="#FFFFFF"
                            Margin="0,0,5,0" HorizontalOptions="End"/>
                        </StackLayout>
                    </Frame>
                </Grid>
            </ViewCell>
        </DataTemplate>
    </ListView.ItemTemplate>
</ListView>
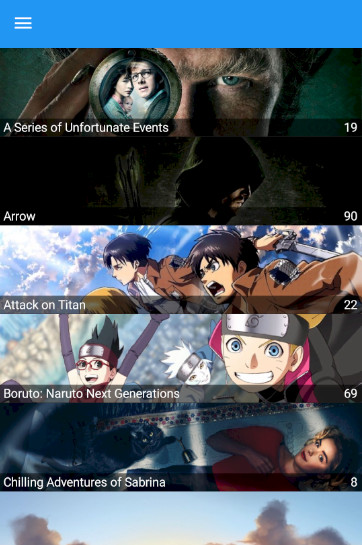
But the result was completely wrong. The black frame is too big and the show title is not displayed.

I tried to change the row definition of the Grid to Auto and let the image take the needed height but the result was the same.
In fact, you have to set the HasUnevenRows property of the ListView to True to force the row height otherwise the ListView will use his default row height size (and the behaviour will be really strange).
<ListView ItemsSource="{Binding Shows}" VerticalOptions="FillAndExpand" HasUnevenRows="True" >
For iOS, I read that you have to set the RowHeight on the ListView or the size will be ignored. I couldn't verify the behaviour but since my items have the same height, I can set the RowHeight property on the ListView and remove the HasUnevenRows property to use its default value (False).
<ListView ItemsSource="{Binding Shows}" VerticalOptions="FillAndExpand" RowHeight="100">
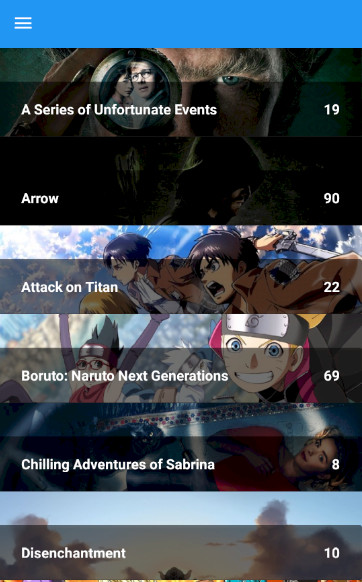
And here is the result: